


Round Head (Wayward Vagabond): COSPLAY TUTORIAL
Do you want to cosplay someone with a round head???!?!
Do you need some help??? WELL YOU HAVE COME TO THE RIGHT PLACE.

Caitie is here to help you on your journey! <3
So if you’re cosplaying someone such as Wayward Vagabond, Aimless Renegade, A Heartless, Someone from Animal Crossing, etc. Then heres a trick you may want to use, of course depending on who you’re doing you’ll have to adjust things. For this tutorial, I was making Wayward Vagabond. If your head shape is different, feel free to use this tutorial as just a guideline.
First you’ll need a balloon, I recommend getting the biggest kind you can find because this needs to be able to fit your head. I dont really know the exact size I got but basically it just needs to be able to fit your head.
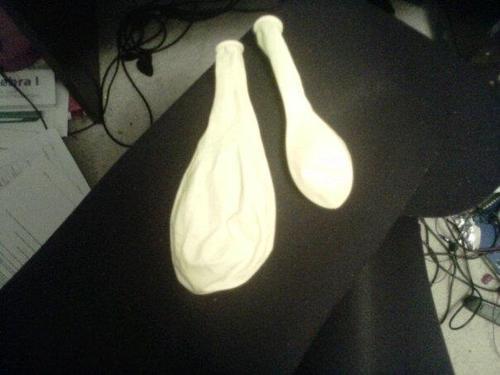
In the picture above the balloon to the right is how it came in the package, and the balloon on the left is what happened after I stretched it out. You’ll need to stretch it out so its bigger if youre like me and bought balloons that are too small. To stretch it out just blow the balloon up and then let the air deflate several times and stretch it with your hands a few times till it looks big enough.
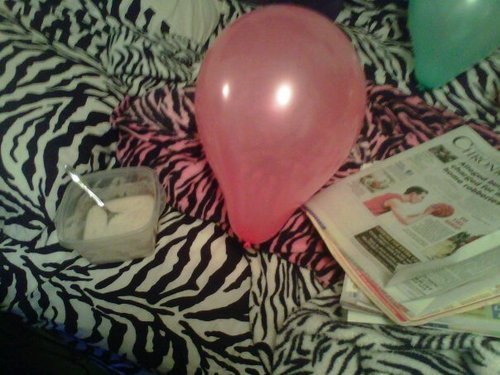
Here are the things you’ll need to make the base,
Paper Mache, The Balloon, and a shit ton of newspaper.
IMPORTANT!!!: How to make the Paper Mache the RIGHT WAY:
GLUE AND WATER. OK? NOT FLOUR. IF YOU USE FLOUR THAT KIND OF PAPER MACHE IS FOR PINATA’S AND THAT MAKES IT VERY EASY TO BREAK.
Just get regular white Elmers Glue and put that into a bowl or something with water, make sure its kind of dog-slobber feely and not too watery or too gluey.
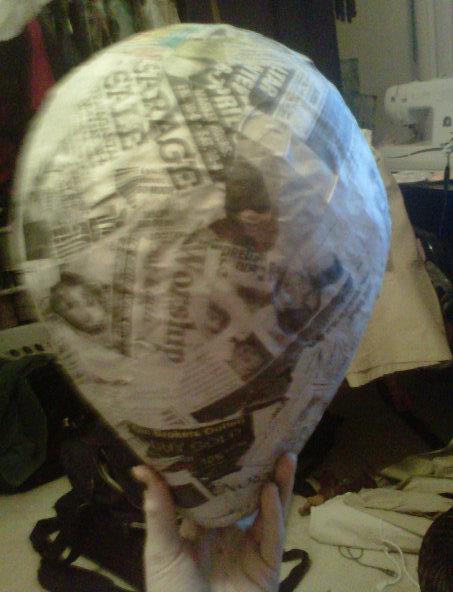
Then, Cover the balloon with the paper mache. You’ll need to do several layers of this. It’s pretty messy so be careful. This also has to be done within one/two days because the balloon will pop and it could cause dents in your head. You need to cover it in the paper mache, let it dry, then do it again. Id say do about 5-10 layers. I think I did like 8 or something i dunno. To get it to dry faster take a hair dryer to it (ON LOW THOUGH, YOU DONT WANT TO START A FIRE.)
In the event that the balloon does pop before you’re done:
Make sure you get the popped balloon out! Take it out and if its dry to more layers of paper mache to make the paper mache wet again, be careful though! Make sure it keeps its shape! Blow into the hole at the bottom where the balloons tie thing was to get rid of the dents. You cant leave it out to dry, you have to blow dry it till it dries and you cant let it sit by itself wet you have to hold it otherwise youll make more dents and your hard work will be ruined!
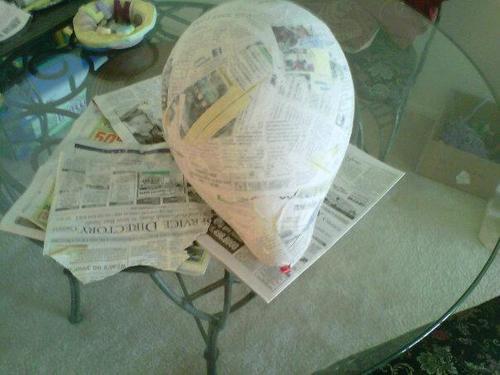
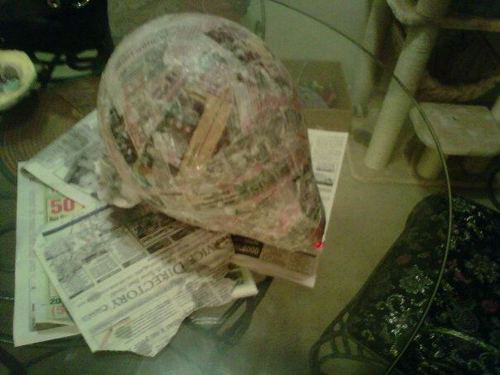
Here’s what it should look like when it dries! (In the picture this was only one layer at the time though!) Try to be as neat as possible! Rip small-ish strips of the newspaper to get it to have less creases and whatnot in the paper.
Next, you’ll need to cut out your eye holes and whatnot. (Keep in mind this is when you’re done with all your paper mache layers and its completely dry! ) If the balloon hasnt popped already, nows the time to pop it and take it out!
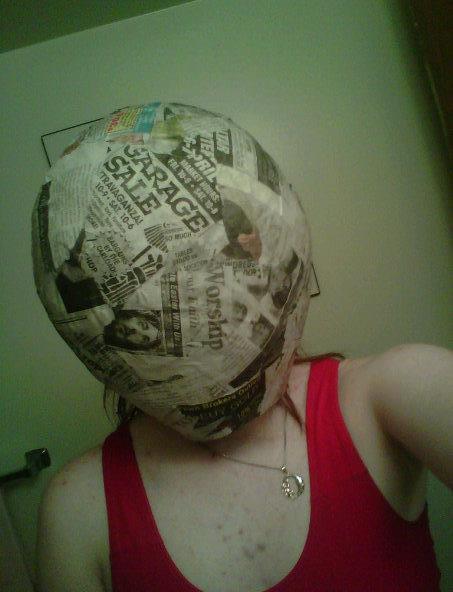
First we need to cut a hole in the bottom so its able to fit on our heads! You may have to cut a bit in the back too, like a helmet! Just make sure you dont cut TOO much! Only cut what you need.
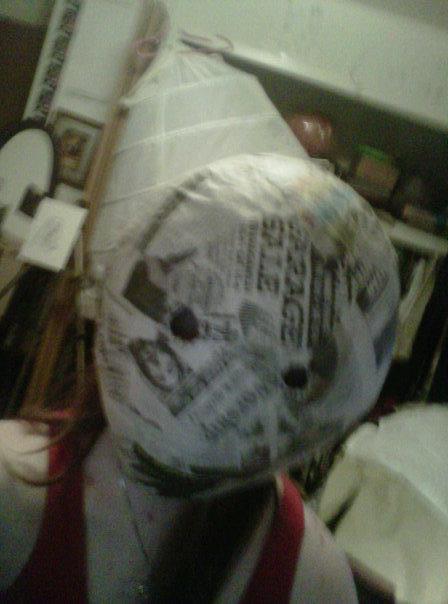
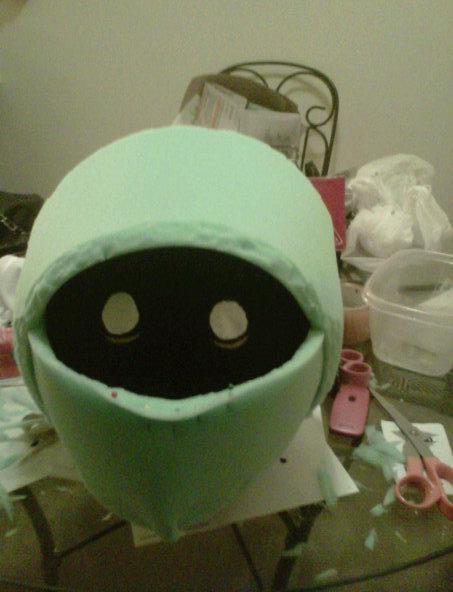
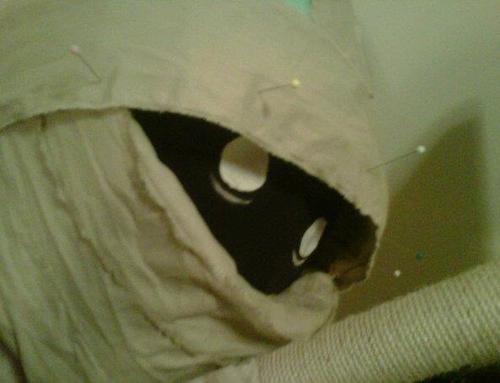
Now we’ll cut the eye holes. To find where they should be I stuck my head in there and shined a light in front of my face and marked with a marker where i could see the light. I then cut small holes and gradually cut them bigger so i could see okay.
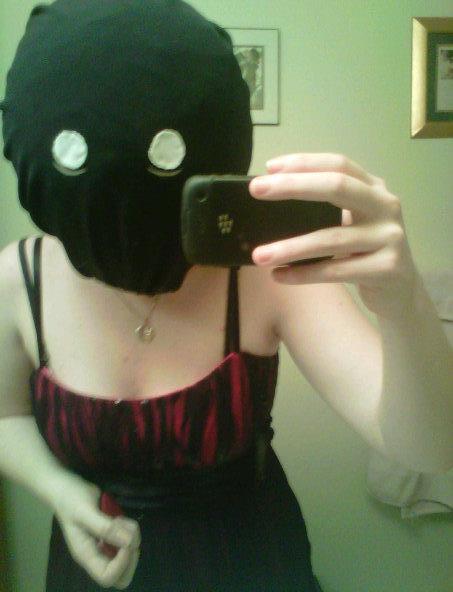
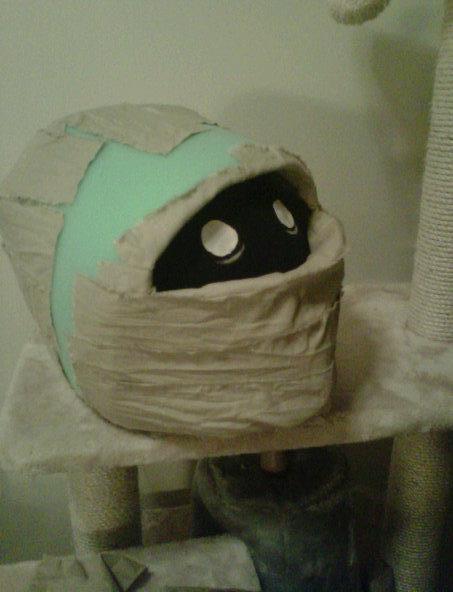
Waywards head is black and so my personal preference was to use black stretchy fabric. I covered it in the fabric and attached it with hot glue. (This was hard because i had to make sure there werent creases in the front by the eyes- the creases in other places didnt matter because it was going to be covered later anyway.) Once I was done with that I cut the eye holes out in the black fabric and glued on the white eyes with a somewhat see-threw fabric. I recommend getting something you can see threw good (mine was a kind of bad decision because you cant really see too well.) whatever works for you I guess, I was just worried about people seeing my face when they take pictures. (You know, Flash photography?)
Next I bought some green foam to make his head shape. I used pins in the front right there to make that shape because it wouldn’t stay. I glued the foam to the head, and to eachother Wherever I could.
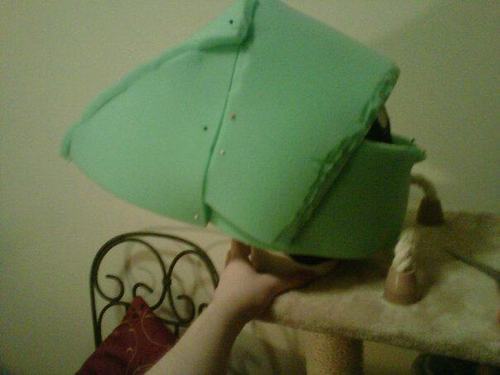
You can see better in this picture what I did. I would pin the foam together to see if i liked the shape and where it was and everything, if i did i would take one pin out, glue right there. I would continue to do that till I hot glued it all and it was all pretty sturdy. I also cut the foam so it blended together better and wasnt super boxy.
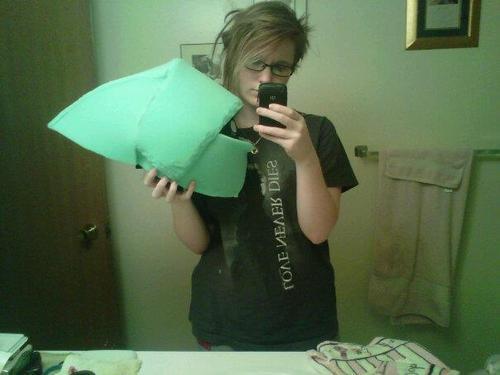
(dont make fun of me i dont look like that anymore ok this was like a year ago cries)
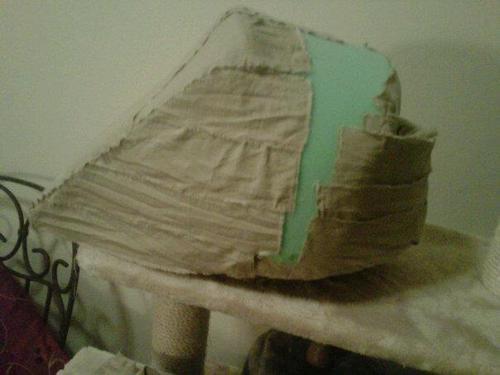
You can see in this picture that it’s all glued together and I am basically done with that. I cut it with scissors to touch it up a bit here and there to make it blend better and less boxy but other than that yesss~ Now all we have to do is put the fabric on!
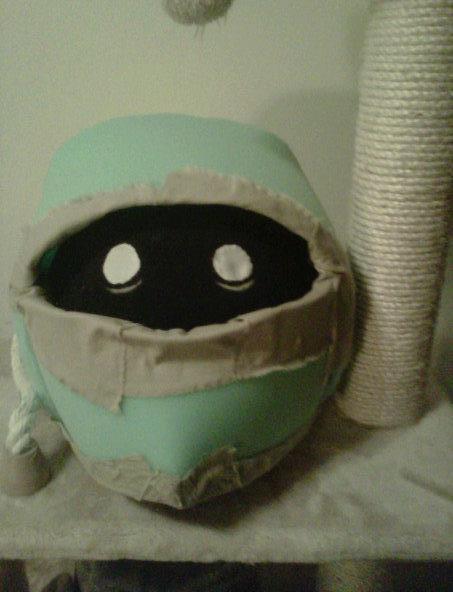
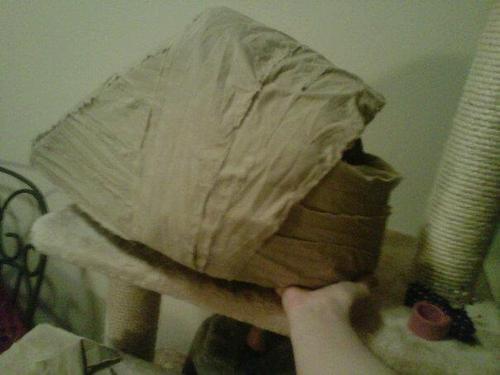
Alright so this is the same fabric I made my outfit with, because thats how he looks duh. I started out putting it on the edges with glue and on the inside so you cant see the green. I used hot glue, and i pinned the fabric there just like i did with the foam before i glued it so i could make sure thats where I wanted it. Its better do to the edges and the inside first because you can cover it later and actually try to look canon and not sloppy.
And now we just cut out the strips and make them all worn looking and then pin and glue to the head! I tried to put them in the directions that they were in the picture so I could get it as close as i could to the design.
Here’s a side view of the process.
And heres the pinning process, this was the last piece I did.
and then bam! You’re done! <3
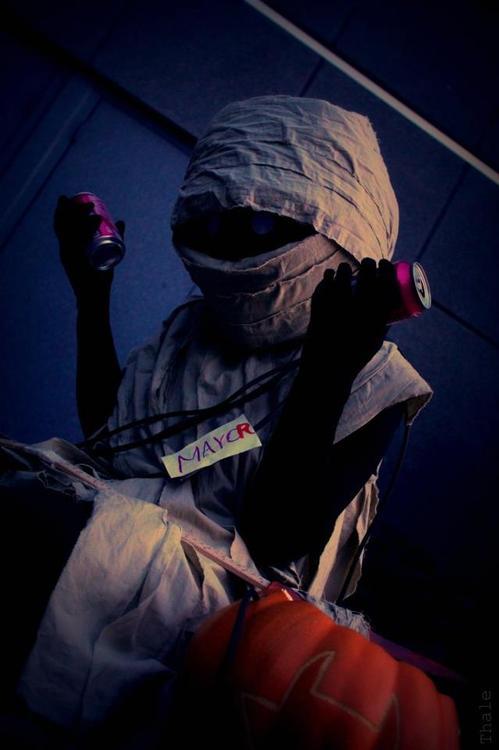
and that’s how you get this bad-ass motherfucker.
(If you want to see more pictures of him feel free to look at my cosplay tag!)
Feel free to send me any questions you may have, or if you have another tutorial suggestion you would like me to make!