
Seriously though, this thing is huge and very image-heavy. It’s designed to be of help to even first-time facepaint users, but some painting skill is required.
Average application time: 2 hours.
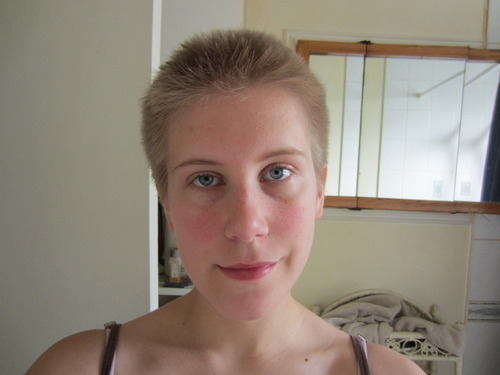
Step 1: Get your face clean and dry. Shouldn’t be too hard, basic human hygene, right? I recommend you take a drink at this point, ‘cause that’ll be awkward later. You should set up some tunes or something, too.
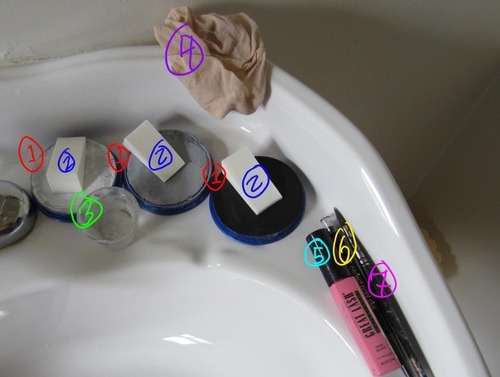
1: Snazaroo 18ml face painting cakes. White, Light grey, and black. They’re water-activated and pretty cheap (6 dollars Canadian each), so I highly recommend them.
2: Those foam wedge makeup applicator thingies. You’ll need three.
3: A small container for water, so you don’t have to turn your tap on and off every two seconds.
4: Wig cap! 5: Mascara (black) 6: Eyeliner (black)
7: A small round paintbrush. But not too small. I think mine’s size 6, Curry’s brand.

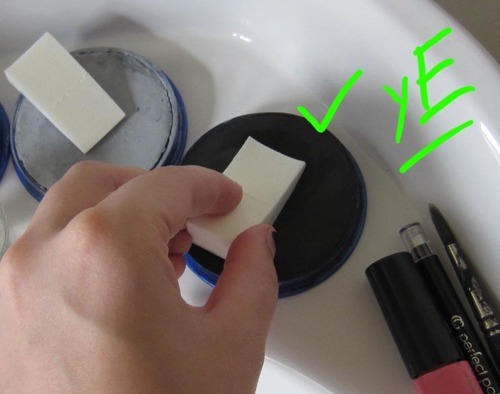
do not dip your sponge in the water. donNOt dip your sponge in the water!! it makes the paint really streaky and hard to control. just don’t do it!!
I forgot about that at the beginning of this process, so the proper way to wet your sponge will be shown a little later. Really though, you just dip your fingers in the water and rub them on the sponge
After you’ve wet your sponge properly, lightly drag it across the paint cake. By the time you’re done your base coat, you’ll have a feel for how wet your sponge needs to be and how much you should pick up at a time.
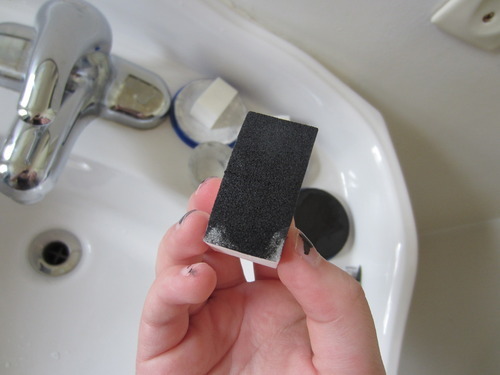
For now, it should look something like this.
You see what I mean about having too much water? It’s very streaky. After I realized my mistake, I had to throw out that wedge and get a new one. (Don’t dip your wedge!!!)
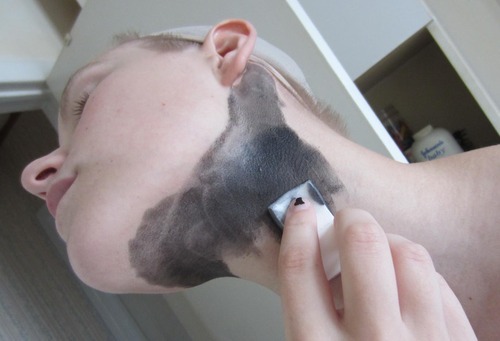
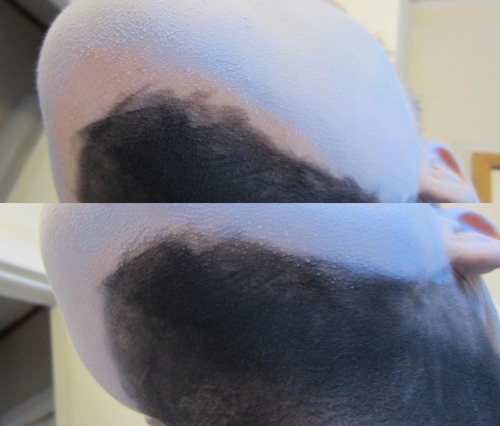
Here I follow my jaw line from behind each ear and then coat my entire neck with black. It’s kind of hard to get the black even. You’ll want to use dabbing motions to apply your paint. (Note: this is important!)
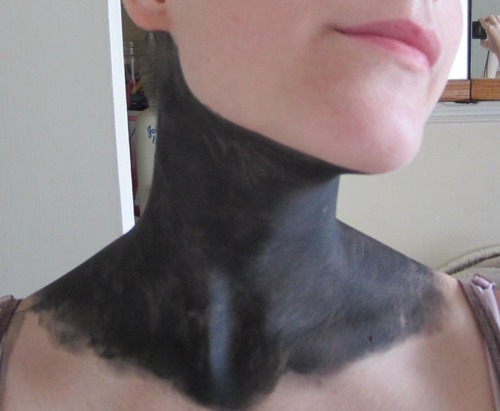
Wow sweet, you’ve got a nice black neck. We’re going to leave that for a bit and let it dry.
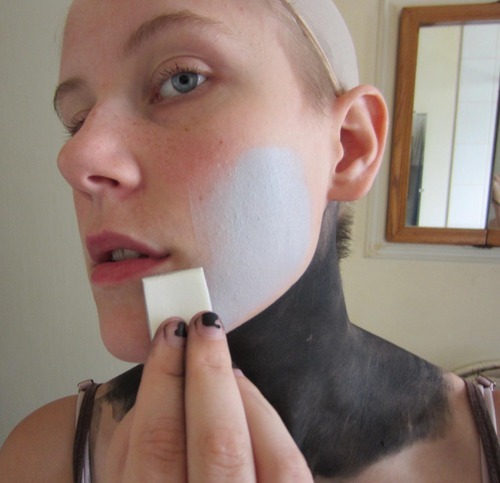
Take a clean wedge and get some grey paint on it. Start dabbing away! It’s more important that the grey is even, so you’ll end up doing a few coats. It’s not as fussy as the black, though.
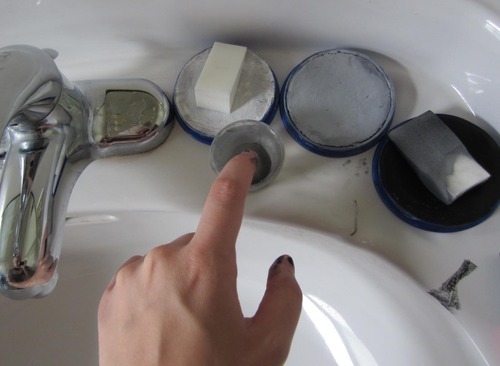
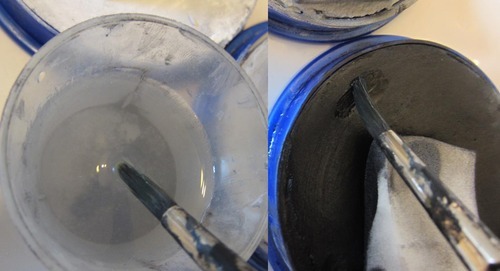
You see that horribly soaked black wedge? That’s what we’re trying to avoid. So here’s what you do: stick the tips of one or two fingers into your little water dish.

And then rub them against the sponge. Your sponge will now be able to pick up paint; you’ll be doing this a couple hundred times. I obviously do this right beside the water dish, but holding the camera I didn’t have enough hands to make that work. :T
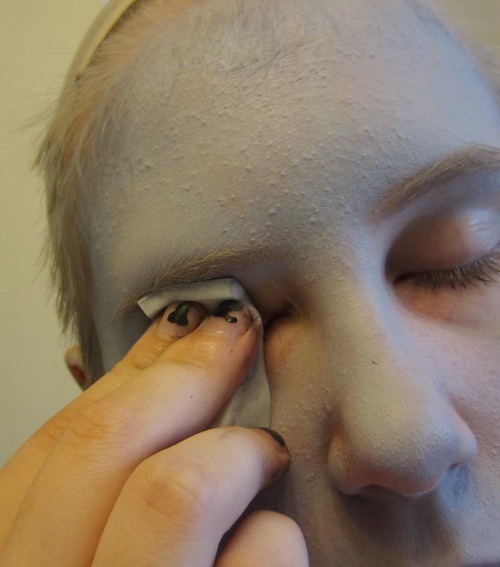
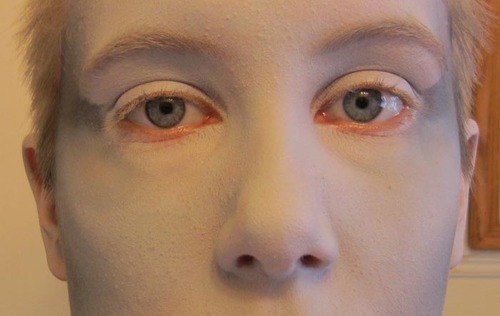
None of this requires any force at all, but you should be careful with your eyes. The best way to apply your base coat is to close your eye and then gently press the wedge onto your eyelid.
After a few dabs it’ll go on even! The paint looks shiny here, but that’s only because it’s still wet.
You’ll be left with this awkward line of clean skin underneath your eye. (I think it looks pretty cool, though)

That’s easy enough to deal with. Pretty soon you’re going to need to be able to make thin lines with your sponge, so that’s a good opportunity to try it out.
After you’re done with most of your face, you want to make sure that the black and grey lines touch. You’ll blend the black line up a bit further later on, but a solid foundation is very important.
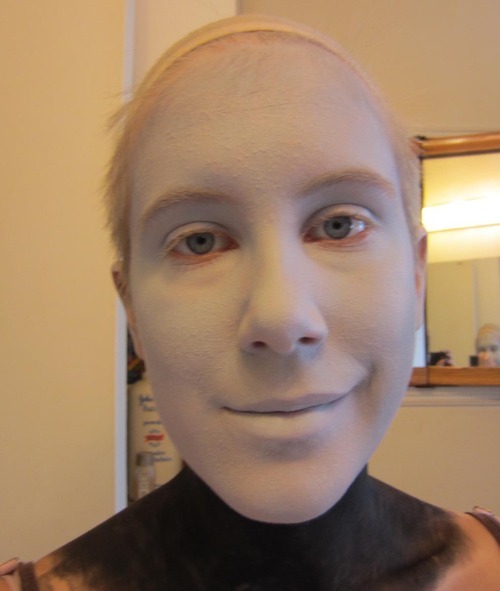
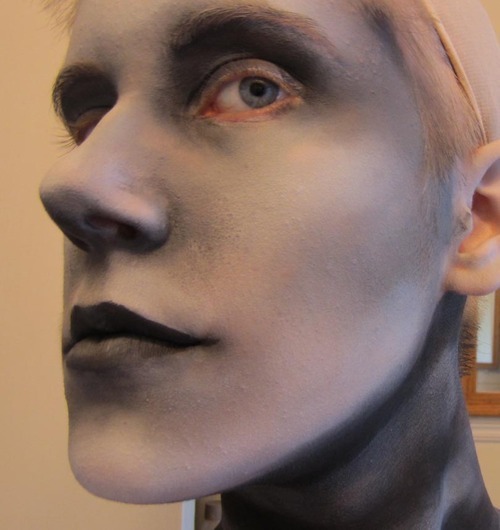
Alright, you are now a featureless greyface.
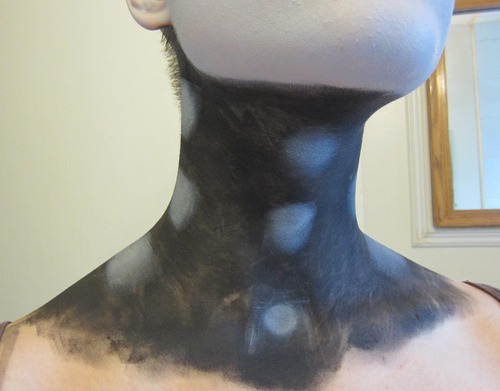
Time to deal with that neck! I’m not dedicated enough to do fully shaded armour plating, because that would take way too long. So I do bands.
Take the sponge you used to do your face, and place dots where you want your bands to be. This will help you keep them relatively straight, as well as providing some (very) rudimentary shading.
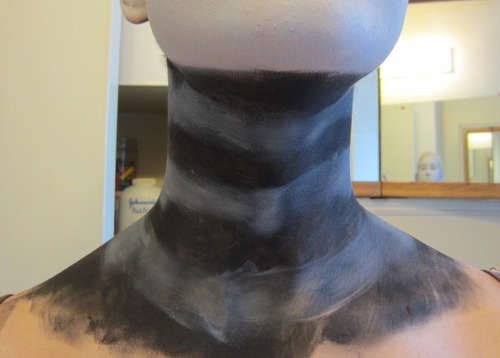
Connect the dots! remember to do this to the back of your neck, too.
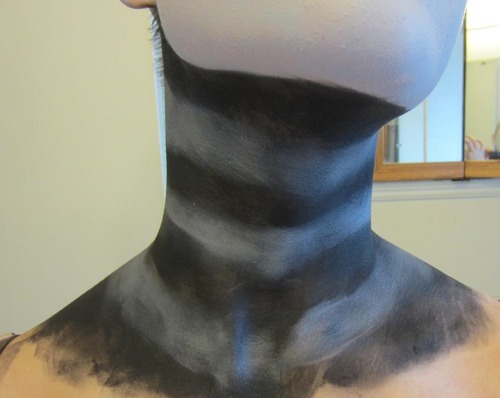
After you’ve done that, return to your dabbing motions. This will eliminate streakyness and make the bands brighter. You don’t want them too bright, though, so be careful!
At this point, I cleaned up some of the black areas (especially around my jawline).

Since you’ve been using your grey sponge on your black neck, it will have gotten dirty. This is exactly what you want, since you’re going to be using it to shade in a sec.
That’s right; we’ve finally reached the contouring. :D
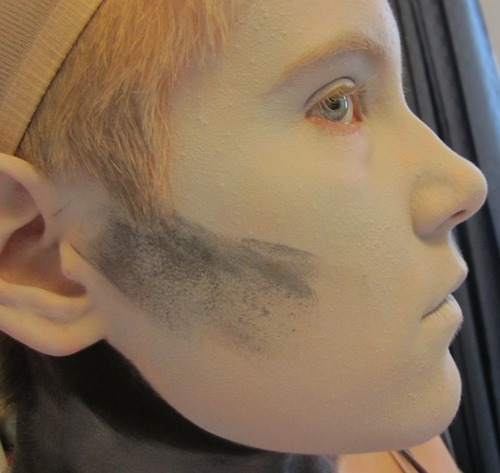
I’ve started with the cheekbones, since that’s what feels most natural for me. I’ve taken the black sponge, fairly dry, and applied just a little bit of pigment. As you can see, it looks rather gross.

Until you blend it with your dirty grey, that is! >:D

So now you add some more black, really build some contrast.
And then you blend it again. That’s the basic formula for the whole face.The trick is finding the right balance between contrast and smoothness.
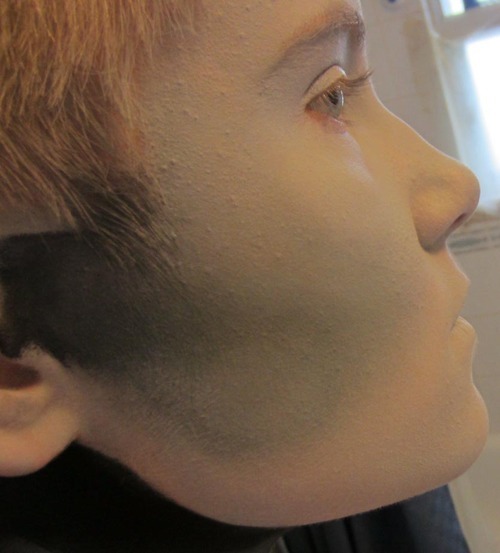
I find the most natural way to tackle a project like this is to flow from one area to the next, a little bit at a time.
Remember to keep both sides even! If you don’t follow along with both sides at once, it’s going to be rather hard to replicate your technique.
And shade! And blend! And shade! And blend!
Needless to say, this kept on getting darker later on. I can’t help going back and darkening/reshaping/reshading all of the already-established shadows throughout the whole process.
Some areas will have darker shadows than others.
Dirk is a puppy. But not really. More like an incredibly loyal cat?
The nose, I find, is one of the trickiest areas to get right. That’s why you’ll notice that throughout the rest of this the nose is constantly changing, since I can’t quite leave it alone.
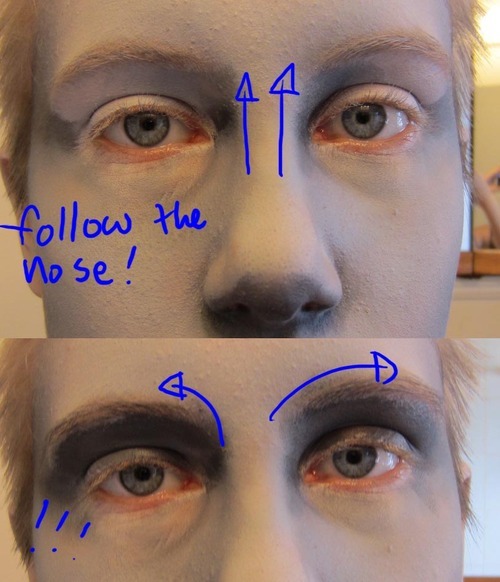
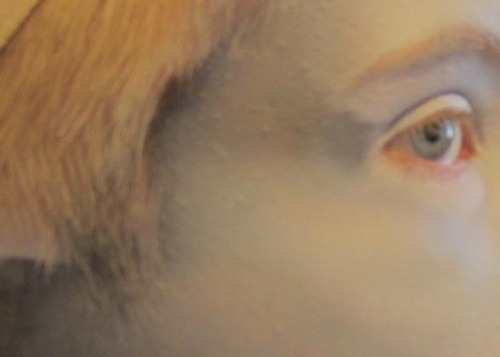
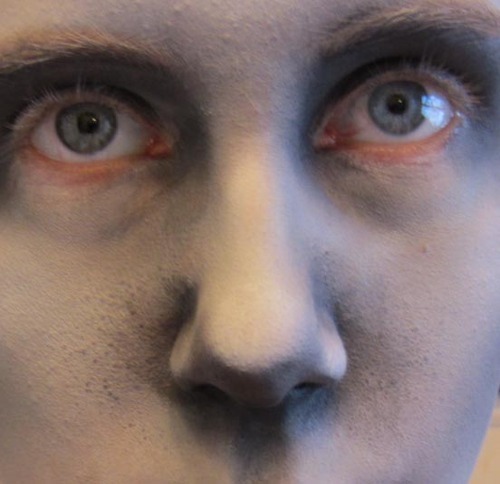
Speaking of noses, once you start shading the nose, the eyes are sure to follow. The inner corner of your eyes will end up the darkest part. c:
Wow seriously Brobot, lay off the eyeshadow. (Don’t lay off the eyeshadow, it’s really important.)
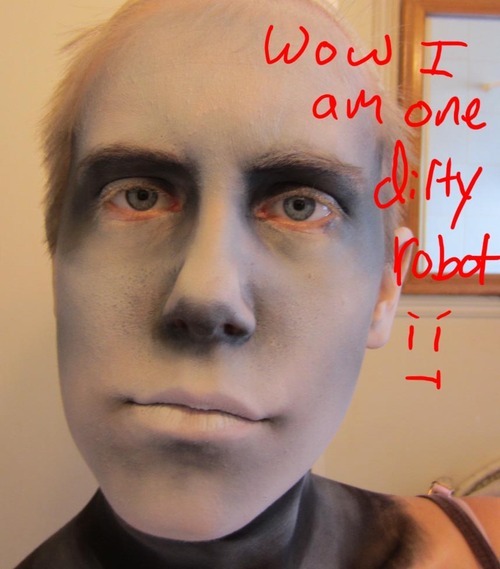
So you’ve been doing all this shading, but you don’t look particularly robotic. You just look kind of grungy, and maybe a little sad.
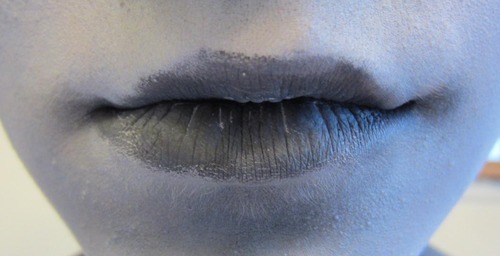
Time to finally bring that white into play!

The process for adding white is exactly the same as adding black. Just apply the shade and then blend it in! The difference here, of course, is that you’re adding highlights instead of shadows.
Oh foam wedge, my one true love~
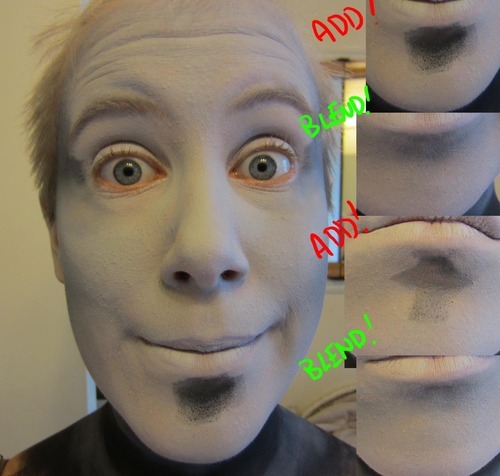
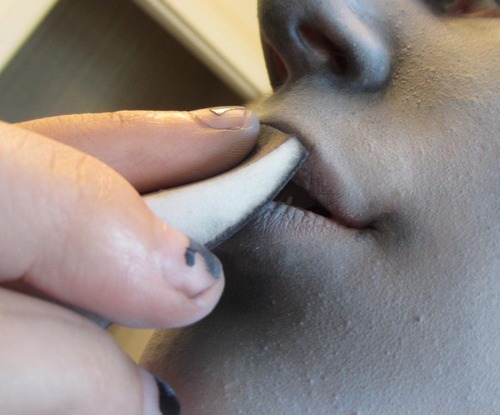
The light lips are starting to look a little too strange, we gotta fix that.
Now that doesn’t look that great. We gotta clean this up somehow.
Detailwork is the reason we brought this brush up in the first place. c:
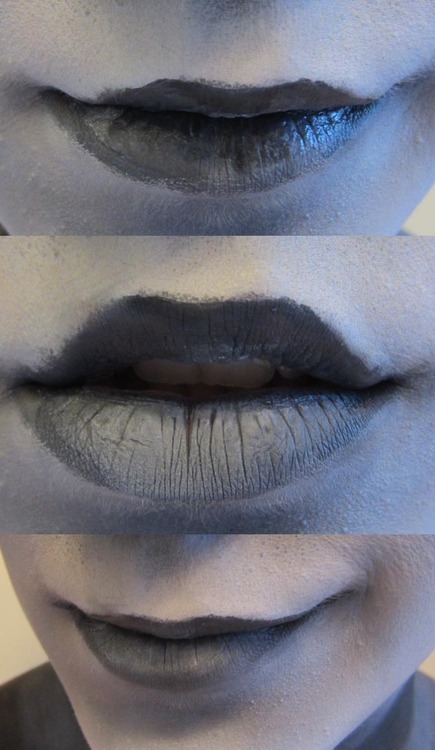
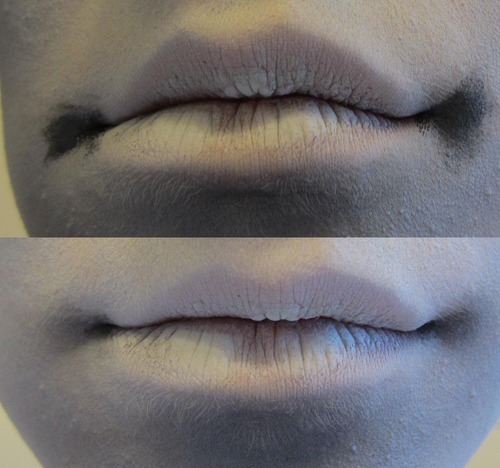
Using a combination of sponge and brush, I shade the lips. The amount of grey I add is minimal, but very necessary. We may be going for contrast, but Brobot probably isn’t wearing lipstick.
One little thing I do here is using the brush to widen my mouth a bit. It makes it a little less girly, and does a little to alleviate the restrictions on expression the makeup imposes.
Don’t overdo it though. Not the Joker, here.
After such finnicky detail work, your hands (and brain) need a break. So right here I took a 'break’ and added some highlights to my jawline.
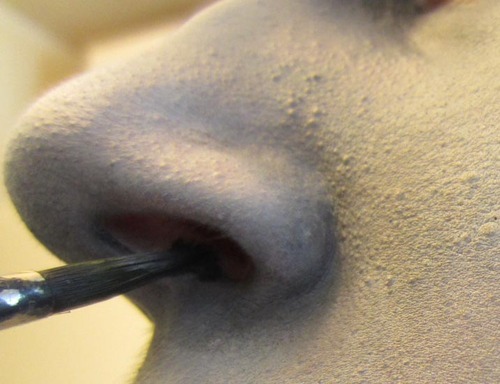
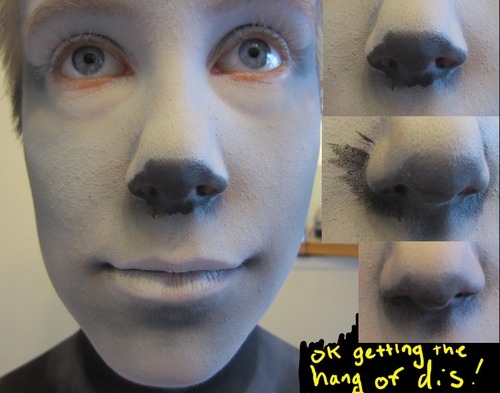
THIS IS ACTUALLY IMPORTANT! When you can see the little pink rings inside the nose, it’s rather distracting.
If you’re borrowing a friend’s paintbrush, you might not want to mention this.
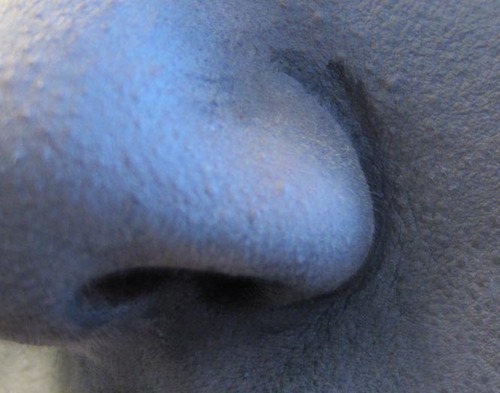
And then you carry the black line up around your nostril. Nice and crisp!!
Not done, but the nose is starting to get some context and contrast.

Now we’re really getting some definition! This light shading was done by drybrushing with the wedge, and that’s a technique that becomes increasingly important as you get close to the end.
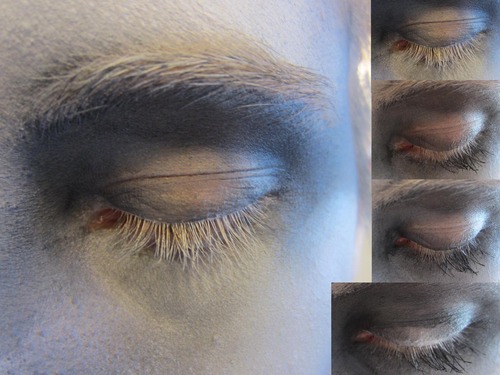
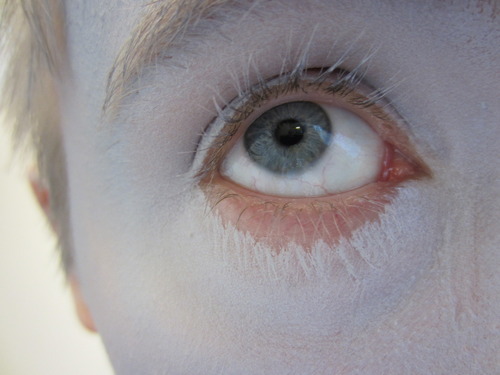
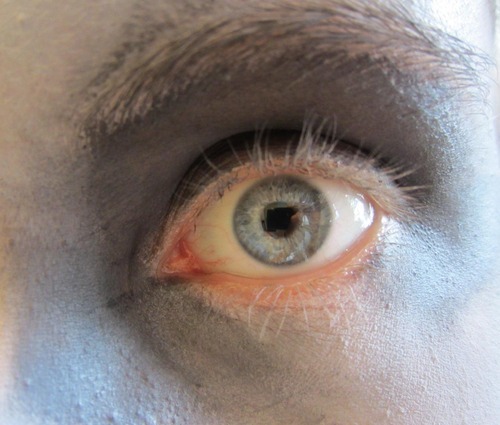
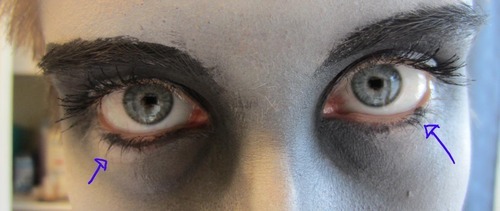
Time to bring some of this contrast up to your eyes. (I suck at using mascara, but) Apply mascara, add a ring your eyes in black, and shade the eyelid. Finally, a crisp line of white is an important part of making your eyes stand out. They’ve got a lot of intense values to compete with, after all.
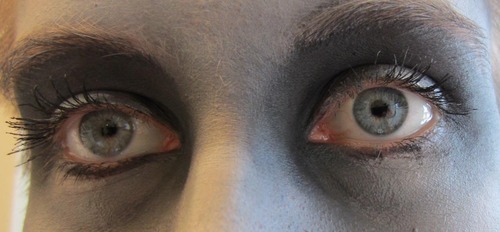
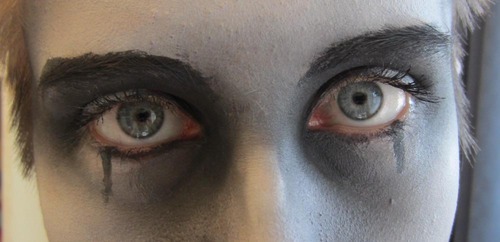
It looks a lot better with the eyes open though omg

Hey there~
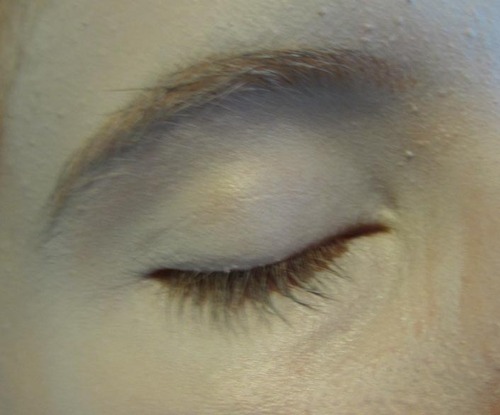
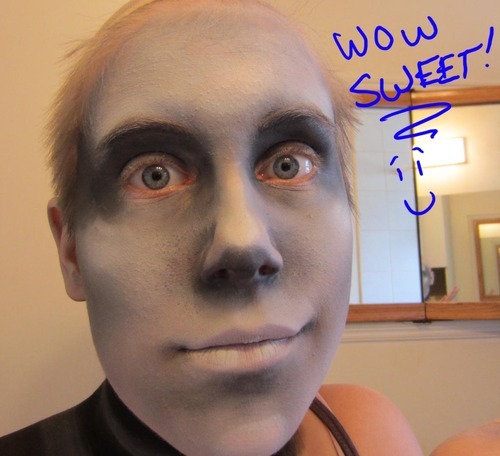
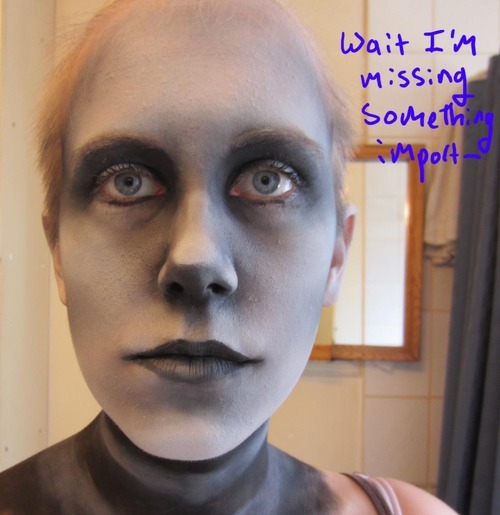
Eyebrows are so important you have NO IDEA i mean LOOK AT THE DIFFERENCE.
Results are best when you paint following the direction of hair growth. Have fun modifying your eyebrows’ shape, but it becomes obvious if you do it too drastically.
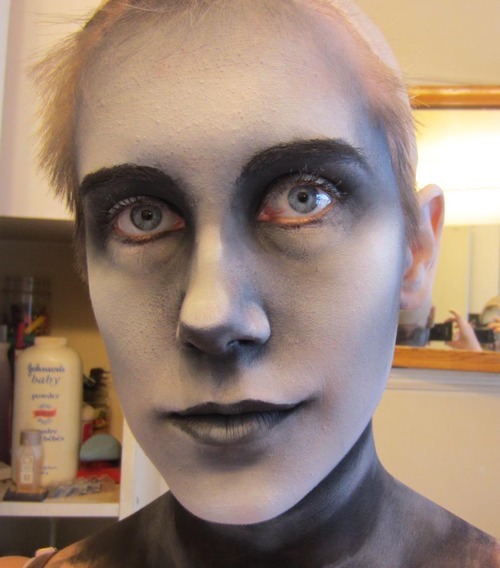
And we are DONE the painting! Before I did this I left the room, had a breath of fresh air. When you look at your face for so long, you get rather used to it.
So I took a break, and then came back into the bathroom and fixed the things that were still bothering me.
What your face looks like at this point will depend on your personal preference, skill level, and painting technique. Whatever that may be, you’re almost done.
To keep the lines on my face even, I start by placing a dot under each eye. It’s far easier to hide a misplaced dot than a giant line.
Step two is drawing the top of the cheek lines. They should be STRAIGHT, and go down to the bottom of the bags under your eyes.
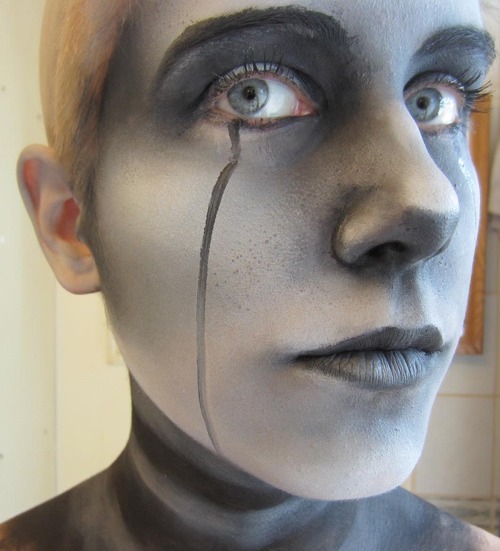
You only get one shot at this. I messed this one up a little, but :/
The most effective way I’ve found of drawing a smooth line from the top of your cheek to your chin is to hold your brush still and move your face. That means that by the time your brush is at your chin, you’re staring way up and to the side.
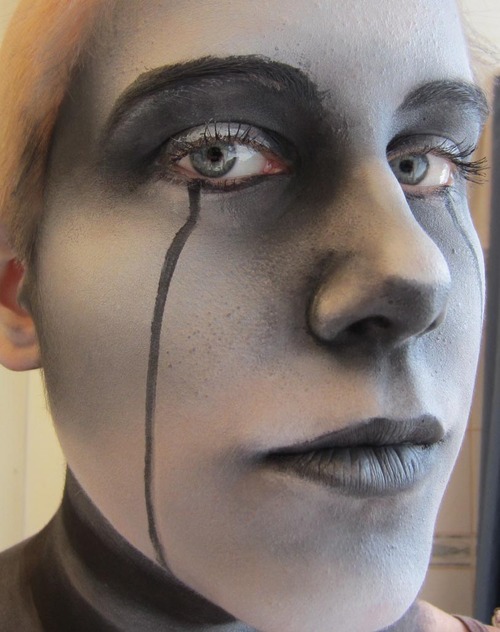
After you have the line in place, you can go in with your eyeliner (!!) and darken up the line. As always, remember to do this on both sides.
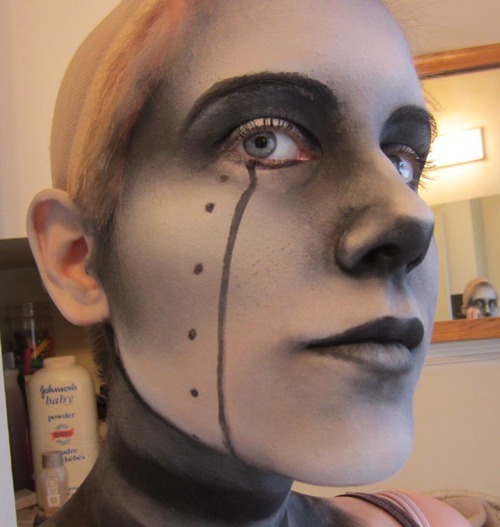
Some people have snazzy 3D 'rivets,’ but I’m cheap, so here are dots. I place them first with the brush, and then make them darker with the eyeliner.
This sounds obvious, but please, count and make sure you have the same amount of 'rivets’ on each side. I know the first time I tried this out, I’d been up for a very long time, and… 7 and 10 are pretty much the same number, right?
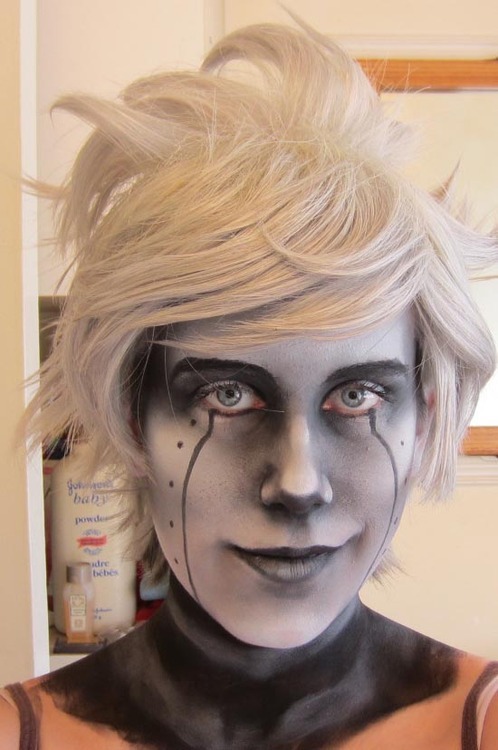
Anyway, now that your makeup’s done, you can put on your wig!
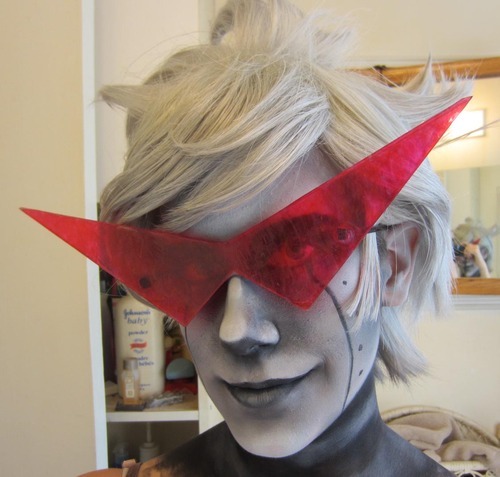
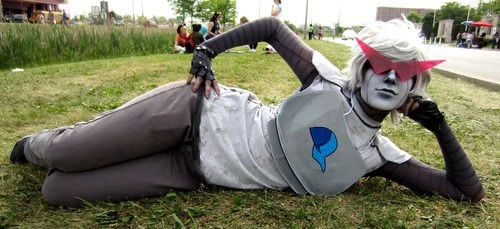
And activate your Strider Swag. >:D
Some final notes: I have no experience with anything but Snazaroo, so I can’t relate this to any other face paint. However, I can give you some advice for wearing this out in public.
Don’t pull it or scrape it AND FOR HEAVEN’S SAKE DON’T GET IT WET, IT WILL RUIN ABSOLUTELY EVERYTHING YOU’VE WORKED FOR, but you can touch it. After it’s dry, it takes a little bit of force for it to come off. It’s dry to the touch, but not powdery.
Keep your face of other people’s cosplays, though. It’s unlikely it will come off, but basic cosplay etiquette.
Bring small, bite-size snacks to the con! Trust me, it’s worth it. Bringing straws will also save you tears.
Thank you, Have fun, and Good luck!
